This is the second part of an underwater photography guide to working with models in water. There is a significant difference between working with people in water whilst on SCUBA to working with someone modelling in a pool. For today’s blog, to get the very best form from your model in the ocean, here are some tips to consider:
Planning
To get a photo like this, planning is key and so let’s start there:

an underwater photographer shoots a giant manta ray as it flies past
- You must have a plan. Know what you want to shoot and show your model either drawings you have made or previous pictures you shot- showing them what you expect and what you are trying to create.In this case I worked with a model who is a brilliant diver and also a photographer and so when I told her how I wanted the manta ray to swim between us to get a forced perspective and for her to pretend to be photographing it- she knew exactly what I meant! As you only have a second to get a shot like this, pre-planning it is key.
- Choose a model who knows how to work and behave around coral and fish or mammals in the ocean.
- A mask is almost always involved in the ocean and so the crazy frog face that hounds freediving photos doesn’t really happen as often here. However, chat about where you want your model to look and what you would like them to do with their hands and feet. i.e must they point their toes and close their legs? Try to ensure they tie up loose hoses and other diving accessories. As you can see from this photo having a diver just plum straight look at you- looks really silly.
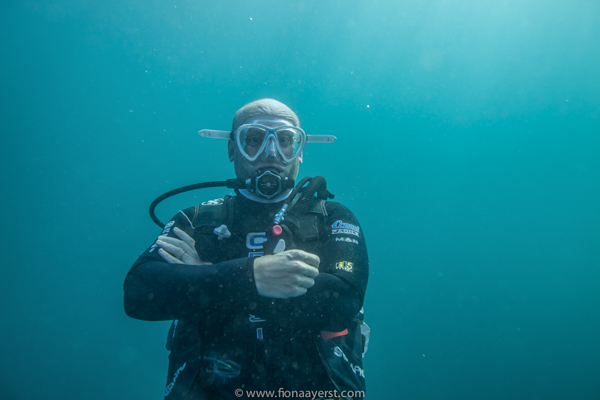
see how silly it looks when a model looks straight at your camera
As you can see from the next photo- having the diver look at something that really matters makes a huge difference.

looking at a pod of dolphins herding sardines on the annual Sardine Run
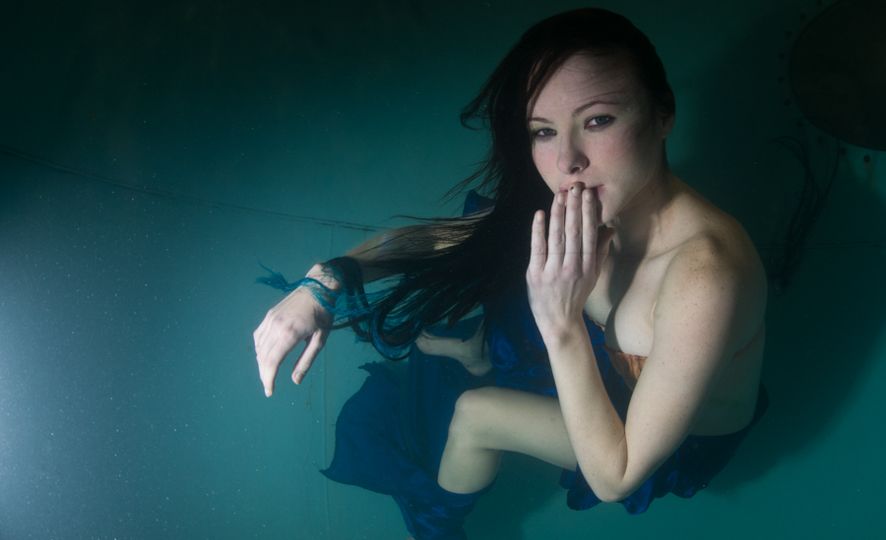
- Try to ensure that the water is a comfortable temperature to work in and if not- that your model has an appropriate exposure suit. In this photo the spring water was warm enough for my model to wear a swim suit but that may not always be the case.
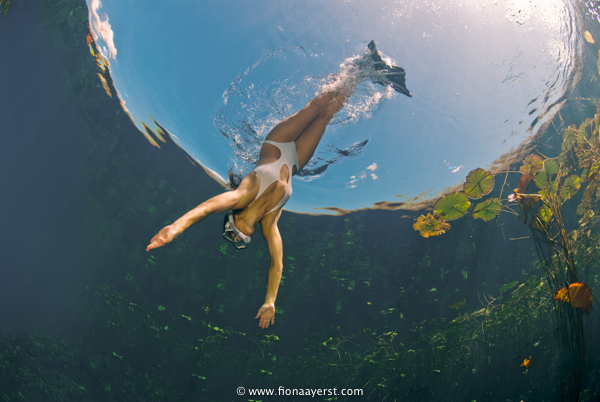
free-diving effortlessly through snell’s window at Marico-Oog
- After diving, if you intend to publish your images for commercial use, make sure your model signs the necessary model release form(s).
- When considering what to dress your model in try to avoid gear that has names of brands brightly emblazoned across it. If selling to stock there could be issues with trademarks that will make the agency reject your otherwise perfect photo.
- Ensure your models mask is not fogged up- ever- in any of your photos.
Working with the model
Communication
It is difficult to communicate effectively underwater. Thus you must have had a very thorough pre-dive briefing:
Hand signals:
You must give your model clear and straightforward hand signals, of which there can be many. Signals I would recommend discussing and using with someone you haven’t worked with often are:
(1) come closer / move back; (2) stop; (3) move up / down; (4) horizontal / vertical (body orientation); (5) face this way / face the other way; (6) keep legs straight; (7) swim slowly here / there; (8) repeat shot; (9) point toes (10) flip on your back (11) look at me / look at the subject / look over my shoulder/look up or down
Orientation of the model
Signal your model to orientate themselves vertically, or horizontally and facing sideways, and keeping their legs fairly straight, so their outline will be clearly visible as a “diver” in your image.
Movement by the model
Because your model has to breathe constantly, bubbles are inevitable and they can ruin shots, so you may want to time your shot when they inhale. However when captured just right, a stream of bubbles from a diver can look great because it adds motion to a ‘still’ image, and enhances the underwater feel to the viewer.
Marine animals cannot be briefed to move this way and that, so ensure your model knows that they need to move around the animal as you have agreed or where possible, as you direct. Everything happens very fast and a bad model who is not comfortable in water can destroy the shots.
Eye contact
looking into the camera can work sometimes but more often, when working with a model looking at fish-life or coral it looks better to have them looking at the subject. Up close, be aware your model could blink as you take a shot, so you should review each image to pick up on faults like this, so you can re-shoot.
Camera settings and lighting
Unless you are shooting in the top 3 meters of water you need strobes. If you are in bright sunlight and shallow water using ambient light then I recommend using a custom/manual white balance and shooting around 1/250th sec, f/11+ and ISO 100. If you’re shooting upwards towards the sun, perhaps to capture your model’s silhouette, then turn off your strobes and use a faster shutter speed and higher apertures (1/500th sec, f/11+) depending on your ambient light. Camera settings obviously need to be changed for various conditions, or to achieve a certain effect, and you should gradually learn what to change and when. For a lovely reef shot in clean blue water I usually work by starting at ISO 200 and F7.1 or 8 at 125th of a sec and getting in to within 1 meter of my subject whilst using a super wide lens. I review the photo and use my histogram to check exposure and if too dark I make the necessary adjustments and re-shoot.
Composition
If your model is far from you, avoid shooting towards the reef/wall etc. so they don’t blend into the background. Try to shoot away from the reef/wall if possible, and isolate the diver with blue water around them. Foreground subjects are the star of the show, so should fill more of your frame, and keep the background model away from the centre, in one quarter of your frame.(google -rule of thirds- if this is not clear to you) .
In this photo you can see a number of compositional elements –
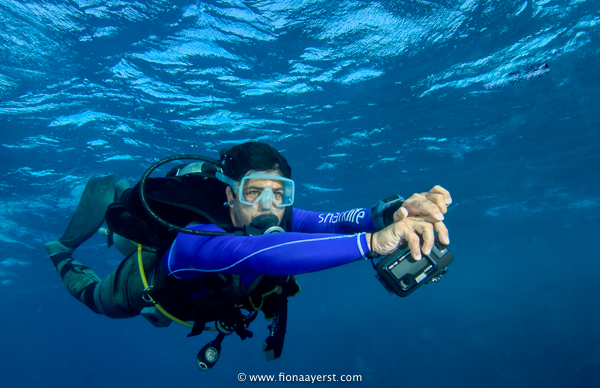
Ryan Johnson showing good form in the Red Sea, Egypt
One is having the diver swimming into the photo slightly towards you and not sideways out of the photo. Secondly, people’s eyes tend to read from left to right in the western world which is where your photo is likely to be published. Consider that also, if you have time. Note the great lighting on the face and the choice of a clear rimmed mask. One issue with this photo is the sharklife trademark but as the author is a director of sharklife that isn’t a problem in this case. Phew!
Managing Expectations
If your model is doing you a favour remember you probably ruined their dive as they haven’t had time to look at anything except your lens. I often pay for my models to dive (except for my husband when he models for me!) and also offer them free photos for their time. I have never had a model ask for anything more than that but it is a good idea to check with them what their expectations are.
Happy shooting
Fiona